Showing posts with label crochet. Show all posts

Friday, May 15, 2015

Baby Brights, a new book by Kathleen McCafferty!

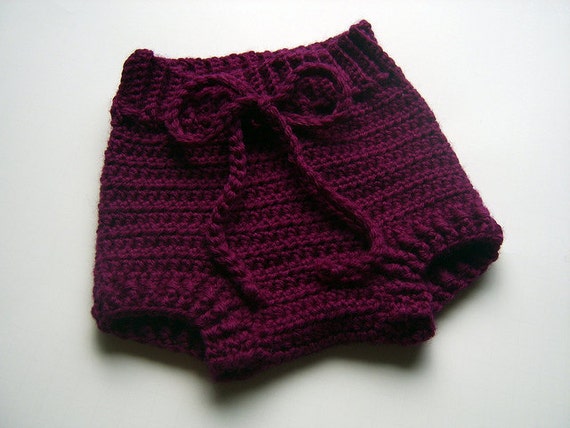
I'm so excited!  Last year, an editor, Kathleen McCafferty, from Lark Publishing contacted me about including my Gillyweeds Top Down Soaker pattern in her upcoming book, Baby Brights.


Of course, I jumped at the chance!

Here it is.  Available now, on Amazon!  Please check it out, there are 29 other amazing patterns in this book, and it's adorable!  I can't wait to receive my copy!


Monday, February 16, 2015

The Gillyweeds Crochet Bib pattern is available again!

I had this pattern posted on my Etsy shop, but had to take it down due to hard drive issues.  Well, it's back!

Just purchase the listing, and you can download the PDF pattern directly to your mobile device, or computer, and crochet away!

Here are a few pictures...this is such an easy, quick pattern, and is a blank slate!  Cross-stitch a design on it, add an applique, crochet a flower or other embellishment, add buttons, you can do anything to dress this up.  I plan to add some free cross-stitch/intarsia type crochet designs on the blog, soon.  I made an owl bib for my son, and loved how it turned out.


Monday, October 20, 2014

Craft Show Displays

Yep, it's craft show season.

I have done two so far, and have two more to go for the Fall.  I may try to do a few over the winter, and in the Spring, but this year is the first year I have done more than two, and it's so  much work!  But always fun.

Here is the set up for my last show.  The black back drop is from the booth next to me, and it hindered my visibility a little, though I angled my table so that I could still catch everyone turning the corner.  As you can see, I only had an eight foot table, and a shelf unit.  The space was 8'x8', so I angled the table, and put the shelf unit in the "corner" so that people could pass through and get out of the aisle while still seeing everything.


The shelf unit is one that you can change the configuration of, so I made it into a tall (around 5 foot) unit, and used it to hang scarves.  Each scarf had it's own hanger, and I had a hand mirror on top for trying them on.  Unfortunately, the next table over was also selling infinity scarves, for half my price, and they had way more than I did, so they sold a ton, and I didn't sell any.  C'est la vie.


On the left corner of the table, is my shoe rack.  On top are my crocheted hair elastics, and the bottom has clothespins to hold the hats.  Each tier spins, so everything can be seen.  It's a heavy bugger, though, and a pain to move around.  I still love it, though, and use it every show.


Remember the wire shelf unit?  I took two of the "shelves" and zip tied them together, and used it as a backdrop of sorts for my hair clips.  I put up the ones I liked the most, and laid the rest out in baskets.  Easy, and I think it looks good!


I dabble in paper items, because they are my favorite things to make, but I have a two year old, and I can't get anything out while he is awake, so I get very little time to work on them.  Someday...

These are bookmarks, mini notebooks and mini sticky notes, a basket of cup cozies, biz cards, and my lovey blankets are just piled on the table.  I got some new baskets and I plan to display the blankets on the sides of the shelf unit and the book marks in baskets, so I will hopefully have a less crowded and nicer looking table for the next show.


I hope to get through this year's two shows, and revamp my offerings for next year.  I need to focus on either crochet or paper.  I hope that my little one helps me make up my mind by staying out of my stuff so I can go all paper, but who knows?  I do like craft shopping when there is a lot to look at, at lots of different price points. 

I try to have some $1, $5, $10-$12 and $15-$20 items at every show.  There are always those people with only a few dollars left looking for stocking stuffers (bookmarks, keychains, mini notebooks) and those looking for a gift for mom or for themselves (scarves), and the baby hats...well, who doesn't know someone who either just had a baby or is due any day, now?

What are your favorite display ideas?  I would love to hear from you!  More importantly, be sure to stop out to St. Wenceslaus Catholic church on Saturday, October 25th, from 9-4.  On the corner of 156th and Pacific!  See you there!

Tuesday, May 13, 2014

Tuesday, Newsday!

I have been adding new listings weekly, and will be introducing new items, hopefully as often!

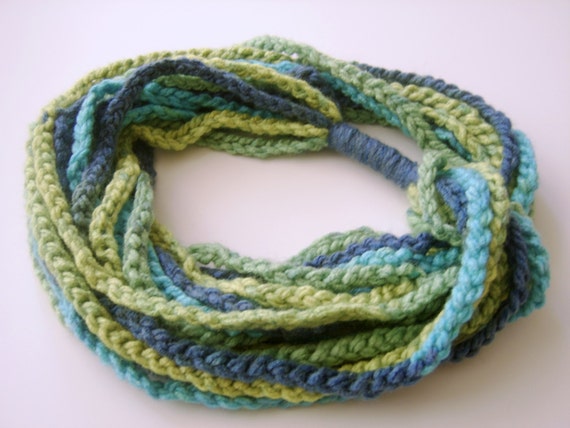
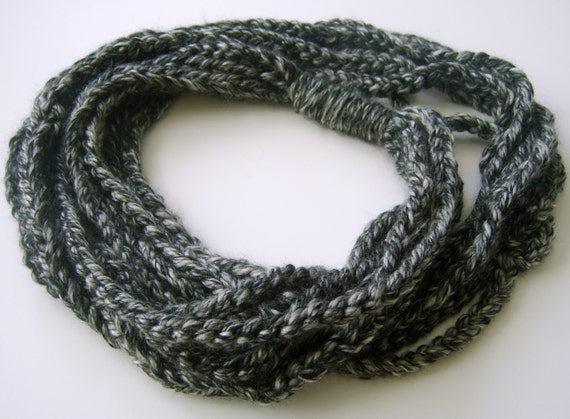
Here is a new item to the Gillyweeds lineup, Infinity Scarves!

So incredibly easy to wear and so many colors to play with!

You can find them in the shop...www.gillyweeds.etsy.com


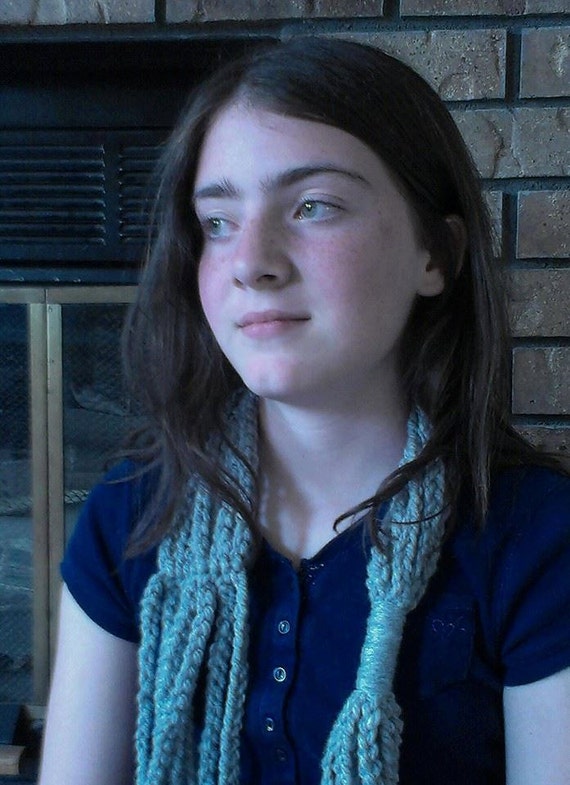
And, here is my beautiful daughter as a model!  I just had to throw this one in here...she gets her looks from her mama!


Tuesday, April 15, 2014

New Flower Clips!

Well, they are not so new, just new to the Etsy shop.

These are so stinking easy to make!

I got the pattern for the flower from the 100 Flowers to Knit and Crochet Book.


It's called a Hellebore, and I love the little star it makes in the middle.  They can be made using all different thicknesses and colors and styles of yarn.  I've mostly used worsted weight and dk weight acrylic, but imagine how fun these would be using crochet thread, on a hat brim, or a sweater's neckline?

Either way, they can be found as hair clips or pins in my shop, just look in the Accessories section!


Thursday, April 3, 2014

Thankful Thursday...two good(ish) hands

I am very thankful this Thursday for two good (mostly) hands.  I underwent Carpal Tunnel surgery in December and am almost back to 100% range of motion, with very little residual pain.

I plan to go into surgery again in the summer for the other hand, but until then, I am enjoying waking up in the morning with only one hand totally numb and burning instead of two!

Either way, CTS can't stop me from crocheting!

I have worked out a new scarf pattern, and will hopefully be able to take pictures soon, and post the free pattern on the blog.  It's mainly a series of chains, and uses superbulky yarn, so it's a crazy fast, fun, satisfying project.

See you soon!

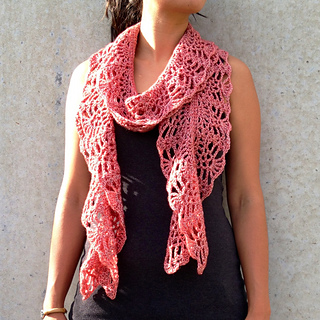
In the mean time, enjoy a few of my favorite free scarf patterns from Ravelry :


Monday, March 24, 2014

Fishbowl Tote Pattern in the works...

Just a quick note to let you all know that my Rainbow Fishbowl Tote pattern is almost done, and will be listed in the shop soon.

This pattern is so easy, and so satisfying!  It uses a double thickness of yarn, to add some sturdiness to the tote, and which allows for a quick project.  The fishies only take about twenty minutes each to make, and can be made in any thickness, with any hook or yarn, to give some leeway in fishy size.

Altogether, this project can be completed in a few days' time, or a few hours, if you are super motivated, and don't have a child hanging on your lap while you work!  In my case, a couple weeks is more on target, but the end result is so fun, it's worth the wait.


To find the custom listing, stop by my shop,  http://www.gillyweeds.etsy.com

Monday, October 15, 2012

St. Wenceslaus Craft Bowtique

Been a little MIA as I prepared for my first craft show of the season.  At St. Wenceslaus Catholic church in Omaha this last Satrurday, I had a table and sold some fun, new items, and some old stand bys.

Here's my whole table, set up and ready for the show to begin:

Craft show display

A close up of some of the displays.  The hats are displayed by clothespinning them to a shoe rack with spinning tiers.  So, customers could spin through and see all the hats, and take them off easily to try them on if needed.

more of the hat display

The Giant Paperclip bookmark display, was just a yellow foam board with ribbon stapled to it!  Easy peasy. I had to stand it up against a box with some heavy food cans in it to keep it from falling over, though!  I then  used a pan with some glass bead magnets and bottlecap magnets filling it up to keep the front in place.

giant paperclip bookmarks

In the middle, I stacked the laminated bookmarks, mini notebooks, mini clipboards, and little sticky note pads all packaged up and ready to gift.  They sold very well...even got some custom orders for the clipboards for my next show in a few weeks.  The flowers are clipped to ribbon attached to a fabric covered foam board, and the other items (scrunchies and hair ties) just in baskets.

paper items displayed on table

I put out an album with photos of past items, as well as my biz cards and some chocolate.  Right before the show started, I added a pad of paper for my email list.  Also, a sign about custom orders.  I did get several hat orders that day, so I think it's really important to let customers know that that is a possibility...especially since I sold out of the owl and football hats I had made!

photo album, cards and chocolate!

Lastly, the lovies were displayed on a crib side that I will not be using for the new baby.  This just leaned up against the side of the table.  Not too steady, but it worked.

Lovies

I was very happy with this show, and hope to do it again next year...see you in a few weeks at St. Elizabeth Ann Church for the Fall Boutique!


Wednesday, September 5, 2012

Scrunchies? Sure!

So, I must admit, I was a big scrunchie user in the 80's.  And early 90's.  And I may still have one in my drawer.  It's my daughter's.

My youngest is three, and just got her first haircut, so I thought a fun scrunchie would be a good way to help her keep her new 'do under control.

I took a simple black hair elastic, and picked a fun yarn...this one's a bit of Red Heart acrylic in Fiesta, I believe.

I used an H hook, but you could use any weight yarn, and any hook that fits.  You will just have to adjust the number of chains, and the number of loops.

Start by tying the yarn in a simple knot to the elastic, then securing it with a single crochet around the elastic.


The rest is easy!  Chain 10, then single crochet into the elastic.  Repeat this pattern evenly around the elastic, making sure you are not over lapping the SC's and not stretching the elastic as you go.


After a while, it will look like this:

Once you have gotten a good ways around the elastic, you may want to snug up the loops by gently pushing them together towards the beginning of the round.  This way you can fit more on the elastic for a fuller scrunchy.  Continue all the way around, finishing with a single crochet at the end.  You don't need to join to the first chain 10 loop if you have made your scrunchy full enough.  If yours is more spread out, you can join to the first chain and fasten off the yarn.


Now, I generally like to tie a simple knot with the two ends of the yarn, and then weave them into the chains.   Isn't it cute?  This one is being modeled by my 10 year old, though, because Miss 3 year old was hiding.


What a great way to use up scraps!  I can't wait to make a pile of these.  Imagine some sequined yarn or something shiny, or even some art yarn!  So fun, and it took me about 15 minutes, even with stopping to take pictures.  Have fun!


Tuesday, September 4, 2012

Who doesn't love football?

Or, at least, cute baby football hats?

These are coming soon to the etsy store...as modeled here by a real cutie pie, and photographed by Frantz Photography...

They can be made in newborn sizes up to toddler, and even adult sizes.  Also, choose basic brown with white accents, or choose your own team's colors!  Around our house, we are Iowa Hawkeye fans, so our new baby will be sporting a football hat in black, with gold accents.  Go, Hawks!


Monday, September 3, 2012

Pumpkin hats!

This was my first attempt at a pumpkin hat, using my own "pattern".  I use that term loosely, as I didn't even really take notes.  I don't like following patterns, and only do so when I'm stumped.  So, anyhoo, the first attempt was starting with the hat, then adding the stem later, and using a double crocheted vine.  I like the look, but the stem is a little anemic, and the vine is too thick, and not curly enough.


So, attempt number two.

I like the more substantial stem.  I single crocheted that in the round, then incorporated it into the beginning of the hat, so there's no sewing it on at the end.  But, it looks kind of  like one of those boob hats that I see here and there.  Oh, well, the vine is nice and curly, and skinnier, which looks more authentic.  At least, as authentic as a crocheted pumpkin vine on a baby hat can look.

The second version will be coming soon to Etsy...as soon as I can get the listing up and going!  See you there!  This time, I'll put the vine on the front, where it belongs, I promise.

Saturday, September 1, 2012

Scrappy Longies for the Bitty

So this summer has been a long haze to me.  I'm now 28 weeks pregnant, my husband had pinky surgery to repair a torn ligement, and was home for 8 weeks, and now, finally everyone is back in school, hubs is back to work, and it's almost back to normal around here.

Now, I feel like I can devote a little more time to the blog and Etsy, while still being able to relax a little.

Here's an easy start to getting back in the blog...longies for the baby!

I've made about 5 pairs so far, and a couple of hats, but I'll just post the most recent longies for now.

First up, a pair of scrappy crocheted longies.  I single crocheted these, so they are nice and thick, but I used several different kinds of wool, so they are a little thinner in some places, where the yarn was a little thinner.  Mostly, worsted yarn, and an I hook.

Yes, we are having a boy!

Next, these knitted longies on Licorice Twist.  I do not remember the name of the colorway (I got it in a trade from Hyenacart forums) but they have a lovely blend of cream, green, blue and purple.  I am not a huge fan of the way they pooled, but I can't say they aren't original!

I have two more pairs coming from swaps, and hopefully, that will round out my wool stash for the first several months, anyway.  I am so excited to see these in action!  =)


Tuesday, April 17, 2012

ROYGBIV

ROYGBIV by s_gilly_5
ROYGBIV, a photo by s_gilly_5 on Flickr.
I love rainbows!

These sweet little rainbow longies were so much fun to make, using up scraps of leftovers from another pair.

These are available for auction on Crunchy Congo Friday, April 20, at 10 am...don't miss out!

Friday, April 13, 2012

Acrylic Longies!

I had a custom request for some acrylic longies. I don't get requests for acrylic very often, but they work very similarly to fleece longies, but look like wool ones. The best of both worlds!

Here they are, crocheted on I Love This Yarn from Hobby Lobby in the High Meadow Stripe colorway. I like how they striped up!

Tuesday, February 14, 2012

Lotus Wool Longies

Lotus front by s_gilly_5
Lotus front, a photo by s_gilly_5 on Flickr.

This is totally not how I pictured these longies turning out. sometimes I envision a pair of longies worked up, then when I actually make them, they surprise me.

I love how these striped up on the legs. It seems random at first, but then you can see there is an order to them, and I adore order, almost as much as I adore letting the yarn do what it will.

These are for sale Friday, Feb. 17th at 10 am EST on Crunchy Congo...go check out the other listings we have up!

Tuesday, August 16, 2011

Soap sacks!

Monkey Farts by s_gilly_5
Monkey Farts, a photo by s_gilly_5 on Flickr.

I've seen these everywhere, but haven't made any yet. Omigosh! They are so fun and easy! I see many of these in my future. The pattern is so simple.

CH 13 using an "H" hook and worsted weight 100% cotton yarn. HDC into the second chain from hook and all the way across.

HDC 2 more into the last chain. Then HDC around the other side of the beginning chain to the other side.

HDC into the last CH, then join with a SL ST to the first HDC. Place a marker here. Continue crocheting in the round until you've reached your desired length, about 2.5 inches, moving the marker up as you go.

When you reach your desired length, crochet to the marker, SL ST into the next ST, CH 3 (first DC) and do a round of DC. Join with SL ST to the rop of the first DC, and then CH 10, and join to the first DC, making a loop. Finish off and weave in ends.

Finally, crochet a double stranded chain, as long as you want, weave it through the DC row, and you have your drawstring! Tie knots in both ends and you have a beautiful soap sack that will also fit over your hand as a bath mitt. You can use the loop to put your thumb in to help keep the mitt on, or to hang your mitt dry.

Find this mitt, and it's matching soap at Crunchy Congo!

Thursday, August 4, 2011

Sunshine lovey

Sunshine lovey by s_gilly_5
Sunshine lovey, a photo by s_gilly_5 on Flickr.

Another sweet little lovey, this time on Superwash wool. I love this color (Sunshine!) and the stitch looks great in the soft superwash.

Available Friday, August 5th on Crunchy Congo:

Http://www.hyenacart.com/crunchycongo

Friday, July 29, 2011

Fairy Tale soaker

Fairy Tale soaker by s_gilly_5
Fairy Tale soaker, a photo by s_gilly_5 on Flickr.

New little (very little!) soaker, just finished up today. The color is called Fairy Tale, and I love how teeny and pink it is! This one is heading to Top to Bottom Baby today!

Sunday, July 24, 2011

Scrappy Solid longies

Scrappy Solid longies by s_gilly_5
Scrappy Solid longies, a photo by s_gilly_5 on Flickr.

I love scrappy longies, but I didn't work over the ends while I was making these, so there were a lot of ends to weave in! I love how they turned out, though.

Wednesday, July 20, 2011

Cotton This Time

cotton lovey by s_gilly_5
cotton lovey, a photo by s_gilly_5 on Flickr.

This is the softest lovey! It doesn't feel soft in your hands, but when you put it up to your cheek, it's super soft! I am not a huge fan of cotton to work with, but once it's done, I love the final effect.

It's going up for sale at Crunchy Congo in August.